Arccos Link Holder
Problem Statement
Using the Arccos Link (now called “Air”) from within a pocket was less than ideal. The microphone on it could easily fail if your pants were thick or if you wore a jacket on top. I looked on their store and saw they offered a clip for $25 (here). I wondered if I could create something myself that would help me explore using Autodesk Fusion 360 and save me some money.
Solution Summary
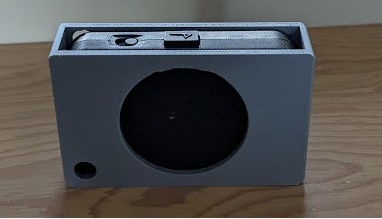
I built a custom designed holder for an Arccos Link. It looks a bit like a pager, which is truly funny for anyone who remembers what those are, and it clips to a belt, pants, or a pocket.
Timeline
- Start: 6/1/2025
- First Prototype: 6/1/2025
- End / current status: 7/1/2025
Demo & Artifacts
Project Core
I wanted to see if I could learn how to build my own 3D prints. I love golf, and had been struggling to use the Link well. So, I decided to address several issues at once by designing and building a holder for the Link that would make it more useful to me.
Inspiration and early learnings
As I mentioned before, Arccos offers an option for $25. I figured I could build one for much cheaper. So I challenged myself to do so. The first 4 prototypes had significant issues. Through them I learned a lot about how to translate 3D designs into 3D prints. Some of the core learnings:
- Overhangs are always going to provide interesting challenges
- More material does not mean more strength
- Usage and human factors must always come first (I knew this for software but did not realize just how shocking the difference is in physical products.)
Getting it right
After a few iterations I had developed a solid working prototype. The first 2 working prototypes I had failed in the same way, the clip snapping right where it met the pants when clipped on. I triaged the issue and realized it was because the layering could sheer right at that point. I tried to design thicker clips but did not have high confidence that they would solve the issue. A friend told me to rotate the build 90 degrees and print it again. I trusted his experience so I took his advice. It fixed the issue entirely. This made me realize:
- Orientation of the print greatly affects the strength of the final product
I have used that same prototype for almost a year, probably 15-20 rounds of golf. It still functions and has not degraded substantially.
Closing
The total cost of the project across the 5 prototypes cost me at most $3.00. Considering that I also learned how to make 3D products that could withstand phsyical activity. I call this an unmitigated win.